Wedding Alterations

The problem with wedding dresses is the fact that when a bride falls in love with a particular style of dress...NOTHING can sway her, not even buying the dress in her correct size.
I spend most of my bridal altering days making small dresses into large ones. People ask me..."HOW do you do that?"
Well, if you are lucky you can use fabric from the lining, or from an ordered separate scarf, or from the hem.
Another problem with laced up back dresses is the fact that they ladies have been sold an "adjustable" dress....oh yes, you can gain a pound or two or lose a pound or two and the dress will still fit.

Some saleswomen sell the wrong size to their clients and I get the problem of how to make a size 12 into a size 18.They also promise that when the dress arrives that all the alterations will be done "in house" but usually fail to do it. These poor girls are sent out with the dress in a bag and told to find their own seamstress. This particular dress was bought at a posh salon in Portland and the client was told that the dress could be shortened but as it is all one lace panel with scallops on the bottom, the only way to shorten it was to make gathered scallops so the bride could walk down the aisle without walking on her front skirt.
This back was meant to be about 4 inches wide with the lacing but the size this bride bought was so small that her lacing ties span an 8 inch gap.
You can see the drag lines from the hips pointing to the real problem...the center back seam at the end of the lacing.
Even though the floppy bow will cover that area, showing one's underwear on the day of the wedding is just not done.
Nothing but trouble here.
The back will never close. The remedy was to open the center back seam 24 inches to the hem and add a panel and cover it in the same lace as the dress and hope for the best.
The client do not like the heavy satin lining so it was cut off at the knees and I used the lining fabric to make a pieced panel 24 inches long and covered it with the same lace from the dress that she had ordered to make possible sleeves.
You can see the stress from the side.
Here is the template for the back panel. To stabilize the panel to hold the bustle it had to have boning and be on straight of grain.
The stress from the hips and side seams have disappeared and the back is relaxed and hanging flat with no gaps. Although the lacing ties have ended up too short to finish being laced all the way down to the final 3 loops, the bow will cover that. I will make a top panel as well to put under the lacing and make sure it is backed with cotton to be more comfortable on a hot summer day.
Things are looking better. Even on the hanger the dress hangs flatter and the bow covers the top of the bottom panel.
Both panels will be handstitched into place down one side and the other side will have large snaps sewn in every 2 inches. The top panel will be boned horizontally to stabilize it under the lacing and prevent it from wrinkling during dancing and bending.
Here is a shot of the lower back panel with lace covering just pinned into position at the first fitting. Once the panel is stitched in, no one will ever know what was added and what was the original dress...well except you and I...ha ha.
Almost done!
The back bustle is simple and anchored to the boning in the back panel.
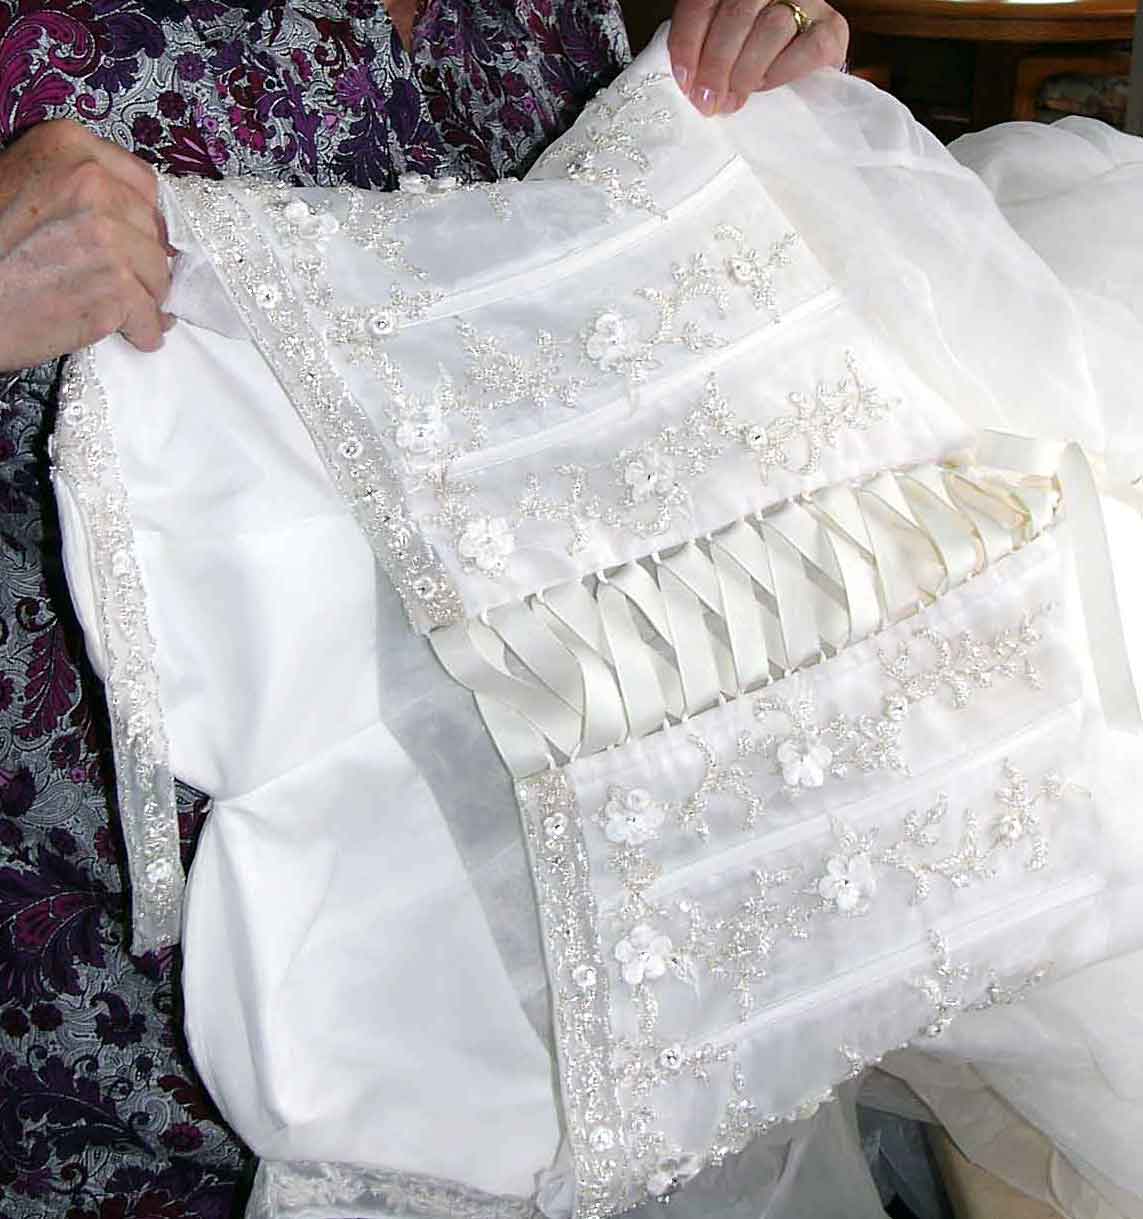
Another dress required me to remove the whole back zipper and replace it with handmade loops and grosgrain ribbon just to get the back closed.Since the bodice was totally boned and was a corset on its own, all that was left was to make loops for each side and hope for the best.
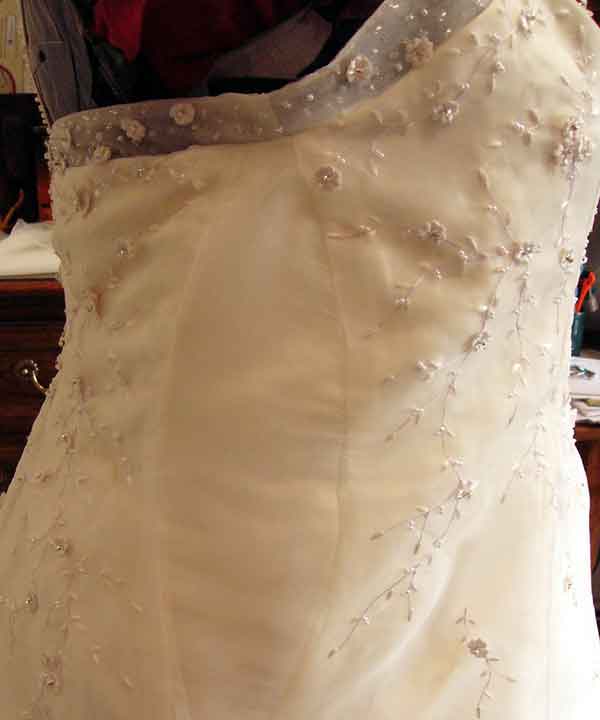
Another bride who bought a size 16 but as you can see from the size and shape of the added panels....was not a size 16.These panels were added to the satin and organza and lining sections. Then the top organza encased horsehair braid edging had to be extended and re-beaded.
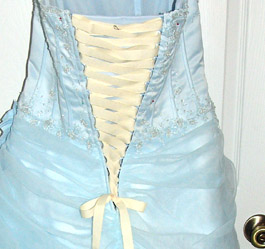
This blue dress had the usual gap in the back too so the answer was another handmade corset back. The cording had to be ordered from a company in NY as it was such an unusual color. The grosgrain ribbon in the photo is very yellow but on tha day of the wedding it will be off-white to match the pearls embroidered all over the dress.
Here is the front of the finished dress. It has a front drape and lots of embroidery and pearls.The dress is really light blue but the photo shows it as ivory.
This dress was stored in a cardboard box for 15 years when the bride brought it to me. It had not been cleaned properly and the hem was just a roll of folded under satin and lining done about 2 times so it was thick and sewn with a running stitch like a child would have done.The top netting has only underarm seams and was torn under one of the arms. The cuffs were buttoned but the buttons were so off centered that they did not close properly. The high neck band was so badly shaped and lined that it was wrinkled and twisted and did no lie flat against her neck. Other than that I had to take in the side seams, the badly made hem and reduce the top of the bust area. Can you imagine who is the designer??? Vera Wang 1994 all silk.
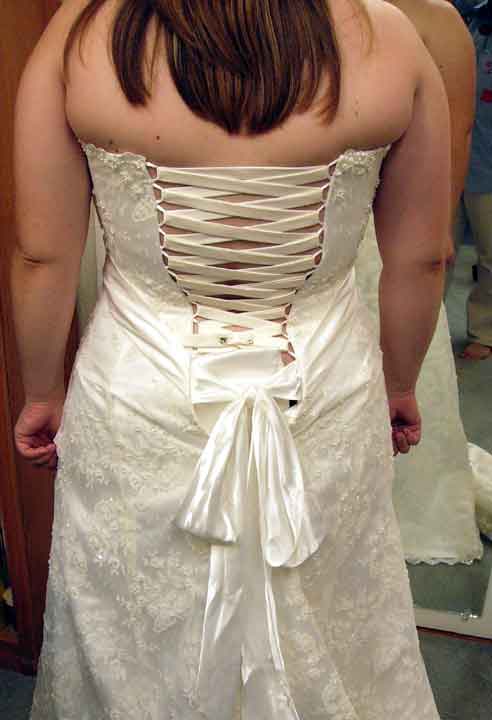
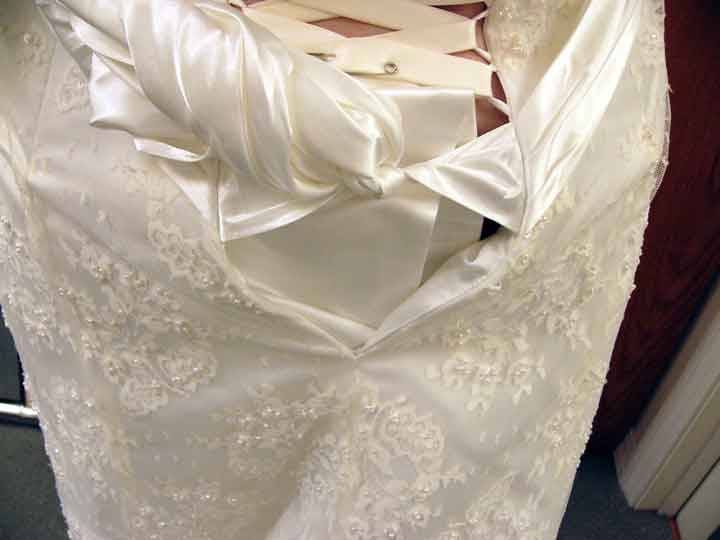
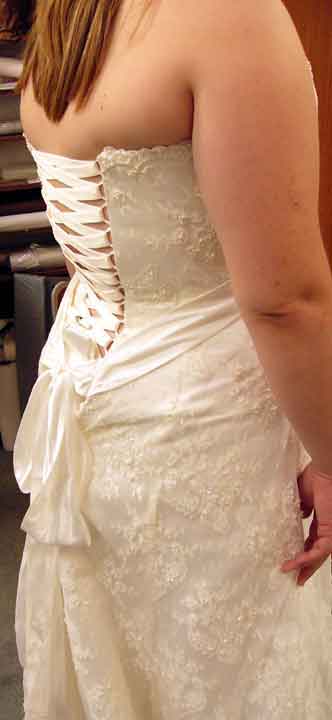
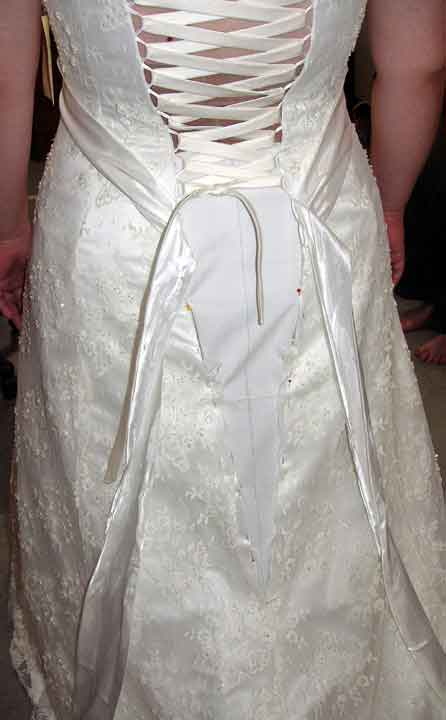
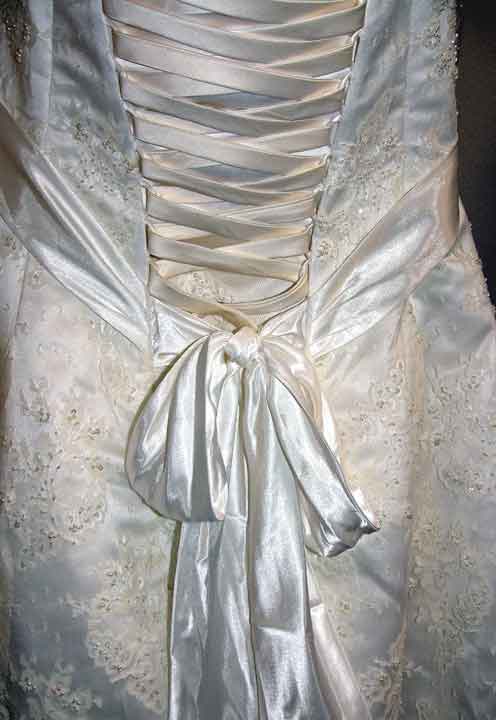
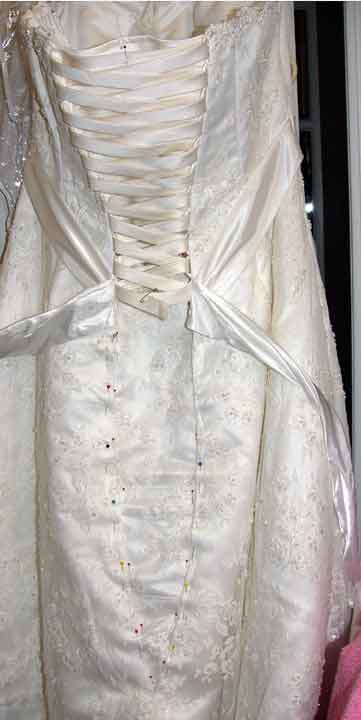
The latest bride who fell in love with her front view while needing another 8 inches across in the back. I removed half the zipper, made rows of corded loops and sewed the corset panels to each side. The safety pin marks the center of the lacing ribbon and anchors it to the satin modesty panel I made during the alterations. Once the dress is finished the new grosgrain ribbon will extend to the bottom (literally) and the bow will be hidden inside.
Here's a neat little trick: This bride needed just a little help to fill in the bust area and all the conventional push-up pads were too big. I took a flat shoulder pad and cut it in half, serged the edges into an oval shape and tacked it into place. These little pads will be just enough.
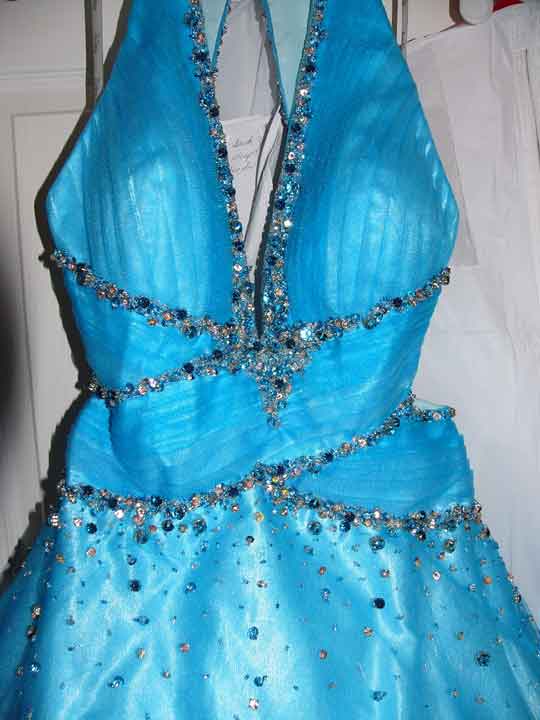
Just to add a little color to this group, here is a prom dress that needed altering. The girl needed the straps shortened as there is nothing in the back of the dress. I had never seen such large jewels or so much flesh exposed for a formal dance.
HOME

This site created at itsmysite.com -- Personalized Web Sites Made Easy!